How to Choose Audio Mixing Consoles and Hardware for a Mastering Environment
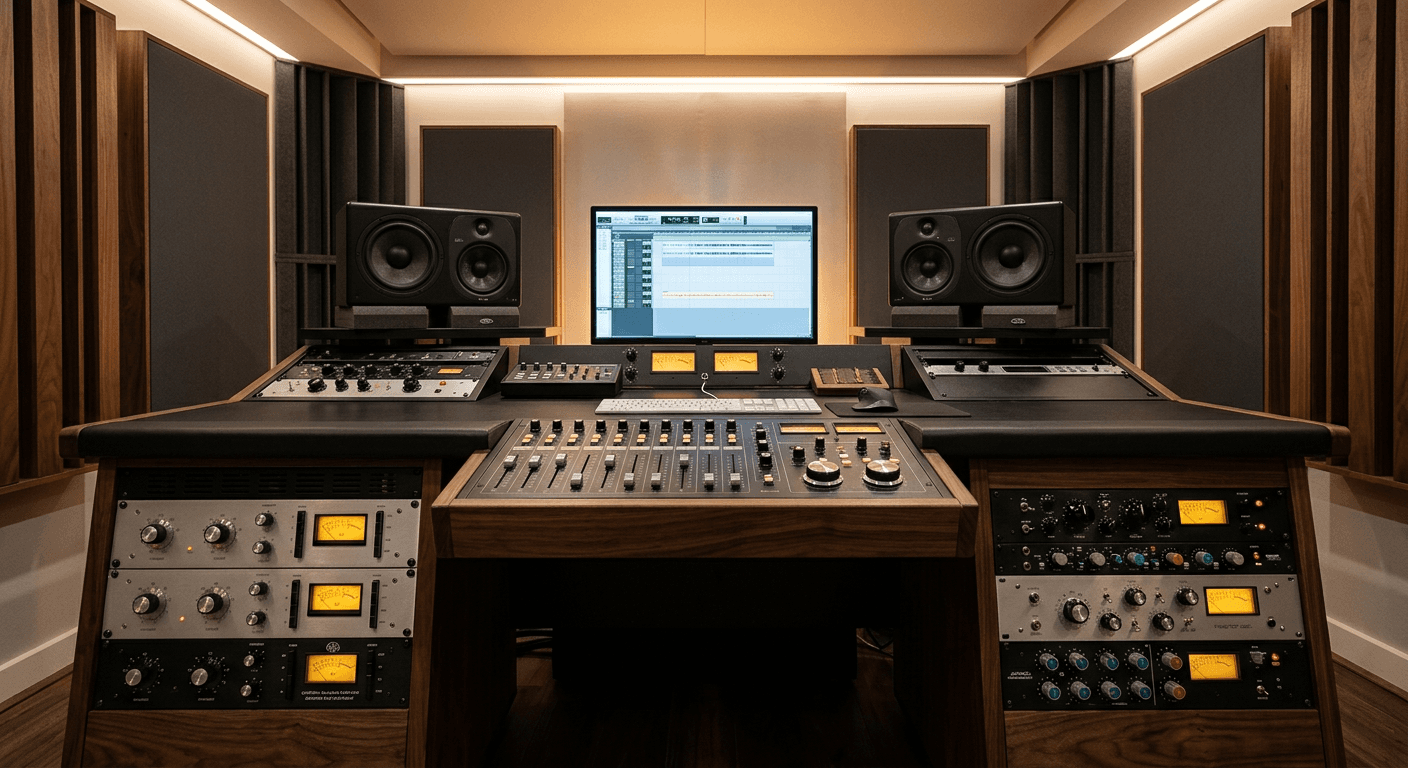
A persistent myth among independent producers is that acquiring massive audio mixing consoles will instantly elevate a home setup to commercial quality. In reality, routing a pristine digital signal through a large format analog desk in an untreated, square room does not create warmth; it creates a highly distorted picture of the low-mid frequencies. The console is merely one node in a signal path that is bottlenecked entirely by the acoustic environment and the digital-to-analog conversion stages. True audio fidelity comes from controlling the entire chain, building a hybrid system where the hardware only amplifies what the room allows you to hear accurately.
Quick Summary
Building a hybrid studio environment requires integrating digital audio workstations with analog outboard gear through high-headroom converters and phase-accurate monitoring. A reliable mastering chain prioritizes acoustic linearity, transparent conversion, and precise gain staging over sheer volume, ensuring tracks translate accurately across all consumer playback systems.
- Acoustic treatment establishes the baseline accuracy for all hardware decisions.
- Conversion quality sets the absolute ceiling for analog outboard performance.
- Proper gain staging between digital and analog domains prevents premature clipping.
- Acoustic decoupling eliminates resonant comb filtering at the listening position.
Table of Contents
- 1. Define the Room's Acoustic Baseline Before Routing Audio
- 2. Select Analog Summing Architecture Over Live Consoles
- 3. Establish the Digital-to-Analog Conversion Loop
- 4. Position Precision Monitors for Flat Translation
- 5. Configure Outboard Processing for Mastering Headroom
- Common Pitfalls & Troubleshooting
- FAQ
- Recommended Reads
1. Define the Room's Acoustic Baseline Before Routing Audio
Any piece of hardware will lie to you if the room it sits in is structurally misrepresenting the frequency spectrum. The physical dimensions of a room dictate its resonant frequencies, known as room modes. When a low-frequency sound wave matches the dimension between two parallel walls, it folds back on itself, creating standing waves that either artificially amplify or entirely cancel out specific bass notes.
Before purchasing outboard gear, the physical space requires broadband absorption and dedicated bass trapping. A 40Hz sound wave is roughly 28 feet long; thin acoustic foam applied to drywall will not slow down or absorb a wave of that size. Effective low-frequency control requires dense, porous materials - such as rigid fiberglass or mineral wool - spanning the corners of the room where bass energy congregates. Observing the layout of a dedicated analog mastering facility reveals that treatment is often built directly into the architecture, prioritizing a Reflection Free Zone (RFZ) at the primary listening position.
The most common mistake in studio construction is over-investing in premium hardware while ignoring the acoustic boundaries. An engineer mixing in an untreated room will constantly cut frequencies around 120Hz because the room is building up energy there, resulting in a final master that sounds thin and lifeless on every other playback system. Fix the room's frequency response first, so the monitors can reveal exactly what the hardware is actually doing.
2. Select Analog Summing Architecture Over Live Consoles
When evaluating audio mixing consoles for a studio designed around both mixing and mastering, the primary objective is capturing harmonic coloration and managing headroom. Large format inline consoles offer extensive routing and equalization on every channel, but they also require massive power supplies, constant maintenance, and significant physical space. For modern hybrid workflows, a dedicated analog summing mixer often provides a more efficient path to that distinct analog footprint.
Summing mixers take multiple digital audio channels. They convert them to analog. An analog resistor network then combines them down to a single stereo track. Passive summing boxes drop the signal level significantly, often by 30dB or more. This loss requires high-quality microphone preamplifiers to apply make-up gain. That gain stage creates desirable harmonic saturation. The signal passes through input and output transformers that gently round off transient peaks and introduce musical even-order harmonics.
The critical error engineers make here is repurposing cheap live-sound consoles for studio summing, under the assumption that any analog circuit will improve a digital mix. Budget live consoles utilize low-grade operational amplifiers that introduce a harsh noise floor and narrow the stereo field when pushed. For studio applications, the chosen summing network or console must possess an exceptionally low signal-to-noise ratio and high voltage rails to handle the transient density of modern music productions. Investing in purpose-built analog and digital mastering equipment ensures the analog stage adds depth rather than distortion.
3. Establish the Digital-to-Analog Conversion Loop
The conversion stage acts as the primary tollbooth between your digital audio workstation and your outboard analog equipment. If the digital-to-analog converter (DAC) suffers from clock jitter or poor analog output stages, no amount of premium outboard gear can recover the lost depth and stereo width. Jitter - microscopic timing errors in the digital clock - manifests as a subtle smearing of high frequencies and a poorly defined phantom center.
In a hybrid setup, audio leaves the computer, passes through the DAC, runs through analog equalizers and compressors, and is captured back into the computer via an analog-to-digital converter (ADC). This roundtrip must be ruthlessly transparent. Furthermore, the operating levels between the digital domain and analog domain must be explicitly matched. Digital audio is measured in Full Scale (dBFS), where 0 dBFS is absolute maximum peak before hard clipping. Analog gear operates on voltage scales (dBu), where a standard professional operating level is +4 dBu.
Practical rule: Calibrate your audio interface so that -18 dBFS in your workstation equals 0 VU (+4 dBu) on your analog hardware. This guarantees that peaks do not overdrive the analog inputs while maintaining an optimal signal-to-noise ratio.
The typical failure at this stage occurs when producers attempt to make a mix louder by driving the output of their DAW right up to 0 dBFS and sending that heavily peaked signal into their analog chain. This instantly overloads the analog input stages, causing unmusical clipping before the signal even reaches the processing circuits. This is particularly problematic when delivering files for stem mastering services, where adequate headroom on every individual bus is mathematically required for the mastering engineer to apply dynamic processing safely.
4. Position Precision Monitors for Flat Translation
Monitoring accuracy relies heavily on placement mechanics and acoustic decoupling. Studio monitors are designed to project a highly directional, flat frequency response, but their effectiveness depends entirely on their physical orientation relative to the listener's ears. The acoustic center of the speaker - typically the point exactly between the tweeter and the woofer - must sit exactly at ear level.
The geometry of monitor placement dictates the accuracy of the stereo image. The left monitor, right monitor, and the listener's head should form a perfect equilateral triangle. If the speakers are pushed too far apart, the center image collapses, causing the engineer to inappropriately boost center-panned elements like kick drums and lead vocals. Furthermore, the distance from the rear walls directly impacts low-end phase coherency. Speaker Boundary Interference Response (SBIR) occurs when low frequencies wrap around the speaker cabinet, bounce off the front wall, and collide with the direct sound, creating deep, unfixable notches in the frequency spectrum.
One of the most vital mixing secrets for the small studio is mechanically decoupling the monitors from the desk surface. Placing a heavy speaker directly on a hollow wooden desk turns the entire furniture piece into a resonant sympathetic membrane. This physical vibration creates immediate comb filtering - a series of sharp peaks and dips in the frequency response that cloud the low-mids. Decoupling stands or dense isolation pads absorb this kinetic energy, immediately tightening the transient response of kick drums and bass guitars.
5. Configure Outboard Processing for Mastering Headroom
The order in which hardware processors are chained together drastically affects the final dynamic range. In a dedicated mastering environment, the hardware chain is typically configured to provide gentle, cumulative control rather than aggressive leveling. A standard mastering chain often routes the analog signal through a transparent optical or VCA bus compressor to establish a cohesive groove, followed by a passive tube equalizer to shape the tonal balance, and finally through a precision digital limiter to define the absolute ceiling.
VCA compressors react quickly to transient peaks, making them ideal for "gluing" a mix together without losing punch. Passive equalizers utilize inductor coils and capacitors to boost and cut frequencies, avoiding the phase shift associated with aggressive active digital EQs. When deploying hardware, Mid/Side (M/S) processing capabilities become incredibly valuable. By matrixing the stereo signal into a Mid channel (center) and a Side channel (edges), engineers can independently compress the driving rhythmic elements in the center while applying a high-frequency shelf exclusively to the extreme sides, widening the stereo image without muddying the vocal.
The hallmark of professional mastering and mixing services is the restraint applied to the analog chain. A recurring mistake in hybrid studios is over-compressing the analog mix bus to achieve commercial loudness. By heavily compressing the signal before the final analog-to-digital conversion, the engineer robs the final digital limiter of the dynamic range it needs to operate transparently. Loudness is achieved in the final digital limiting stage; the analog hardware is there strictly for tonal density and transient shaping.
Common Pitfalls & Troubleshooting
The Phantom Center Collapse (Phase Issues)
- Symptom: The mix sounds incredibly wide in stereo, but when switched to mono, the lead vocal, kick drum, and snare disappear almost entirely.
- Diagnosis: This indicates severe phase cancellation between the left and right channels. In a hardware setup, this is most often caused by using unlinked dual-mono outboard compressors with slightly different attack or release settings, or running balanced audio cables with reversed wiring on one channel.
- Fix: Route a simple mono sine wave test tone through your entire analog chain. Meter the left and right returns independently. Ensure your analog equipment is strictly calibrated left-to-right, and always link the sidechains of stereo bus compressors to ensure both channels apply identical gain reduction simultaneously.
Inter-Sample Clipping at the Conversion Stage
- Symptom: The final digital file exhibits harsh, crackling distortion during loud passages, despite the DAW meters never indicating that the signal has breached 0 dBFS.
- Diagnosis: This is caused by inter-sample peaks. When digital audio is reconstructed into a continuous analog waveform by the DAC, the physical analog wave can arc higher than the individual digital samples that define it, overloading the analog output stage of the converter. This is highly detrimental when preparing audio for specialized vinyl mastering services, where high-frequency distortion is exaggerated by the physical cutting needle.
- Fix: Implement true-peak metering in your final monitoring stage, and always leave a ceiling of at least -1.0 dBTP (True Peak) on the final digital limiter to ensure the DAC has enough internal headroom to reconstruct the analog wave cleanly.
The 60Hz Ground Loop Hum
- Symptom: A constant, low-level 60Hz (or 50Hz, depending on your region) buzzing sound is present across all recorded tracks, regardless of what gear is active.
- Diagnosis: A ground loop occurs when interconnected pieces of analog hardware are plugged into different electrical outlets with varying ground potentials. The audio cables connecting the gear inadvertently create a secondary path to ground through their metal shielding, causing alternating current noise to flow directly into the audio path.
- Fix: Implement a star grounding scheme. Plug all interconnected audio equipment into a single, high-quality power conditioner on the same dedicated electrical circuit. If the hum persists between two specific rack units, use an audio isolation transformer or lift the audio ground by severing the connection on pin 1 of the XLR cable on one end of the problematic run.
FAQ
Do I need a subwoofer for mastering? Integrating a subwoofer is only beneficial if your room is acoustically treated to handle frequencies below 50Hz. In untreated rooms, a subwoofer will trigger severe room modes, causing you to make inaccurate equalization decisions. If your space lacks heavy bass trapping, high-quality open-back headphones are a safer tool for checking sub-bass frequencies.
How many channels of conversion do I need? For a dedicated stereo mastering chain, a high-quality 2-channel DAC (to send audio to the hardware) and a 2-channel ADC (to record it back) are sufficient. If you are integrating a summing mixer or multiple stem processing loops, you will require multi-channel converters (typically 16 to 32 channels) to route individual DAW buses to the analog domain.
Can I use a digital live mixer for analog warmth? No. Digital live mixers process audio entirely within the digital domain using DSP. Passing a digital signal out of your DAW and into a digital live mixer simply runs the audio through two extra stages of conversion without applying any analog transformer or tube coloration. True analog footprint requires physical circuitry.
What is the standard monitoring level for mastering? The widely accepted standard for professional monitoring is between 79dB and 85dB SPL (Sound Pressure Level) at the listening position, measured with a C-weighted SPL meter. Monitoring consistently at this volume minimizes the nonlinearities of human hearing (the Fletcher-Munson effect), ensuring that your perception of bass and treble remains flat and objective over long sessions.