How to Configure Studio Monitors for Mixing and Reliable Translation
You bounce the track. Inside the room, the kick drum punches through the chest, the bass sits perfectly, and the vocals sound intimate and controlled. You take the file out to the car, hit play, and the illusion collapses entirely. The bass has completely vanished, while the vocal sibilance tears harshly through the tweeters. The track itself did not change; the room lied to you. Setting up studio monitors for mixing is not about making the audio sound impressive or loud. It is about forcing the speakers to tell the uncomfortable truth. If your monitors are poorly positioned, mechanically coupled to a resonating desk, or fighting against untreated room boundaries, every equalization decision you make is merely a counter-measure against the room itself, not an actual improvement to the mix.
Quick Summary
Configuring monitors for precise mixing requires aligning the exact acoustic axis with the listening position, mechanically decoupling the heavy cabinets from structural resonances, and aggressively mitigating boundary interference that causes low-end frequency cancellation. A strictly calibrated monitoring environment ensures that mix decisions translate predictably to consumer playback systems without unwelcome surprises.
- Establish a rigid equilateral triangle between the tweeters and the mixing position to maintain acoustic phase coherence.
- Decouple speakers using mass-loaded stands to prevent desk resonance from artificially extending low-frequency decay times.
- Calculate distances from the front and side walls to minimize Speaker Boundary Interference Response (SBIR) cancellation nulls.
- Calibrate playback to a fixed reference level (75 - 80 dB) to combat the equal-loudness contour biases inherent in human hearing.
Table of Contents
- 1. Establishing the Equilateral Listening Geometry
- 2. Decoupling the Monitors from Structural Resonance
- 3. Calibrating for Speaker Boundary Interference Response (SBIR)
- 4. Mitigating Desk Bounce and Comb Filtering
- 5. Setting a Fixed Reference Listening Level
- 6. Integrating Secondary Translation Checks
- Common Pitfalls and Troubleshooting
- FAQ
- Recommended Reads
1. Establishing the Equilateral Listening Geometry
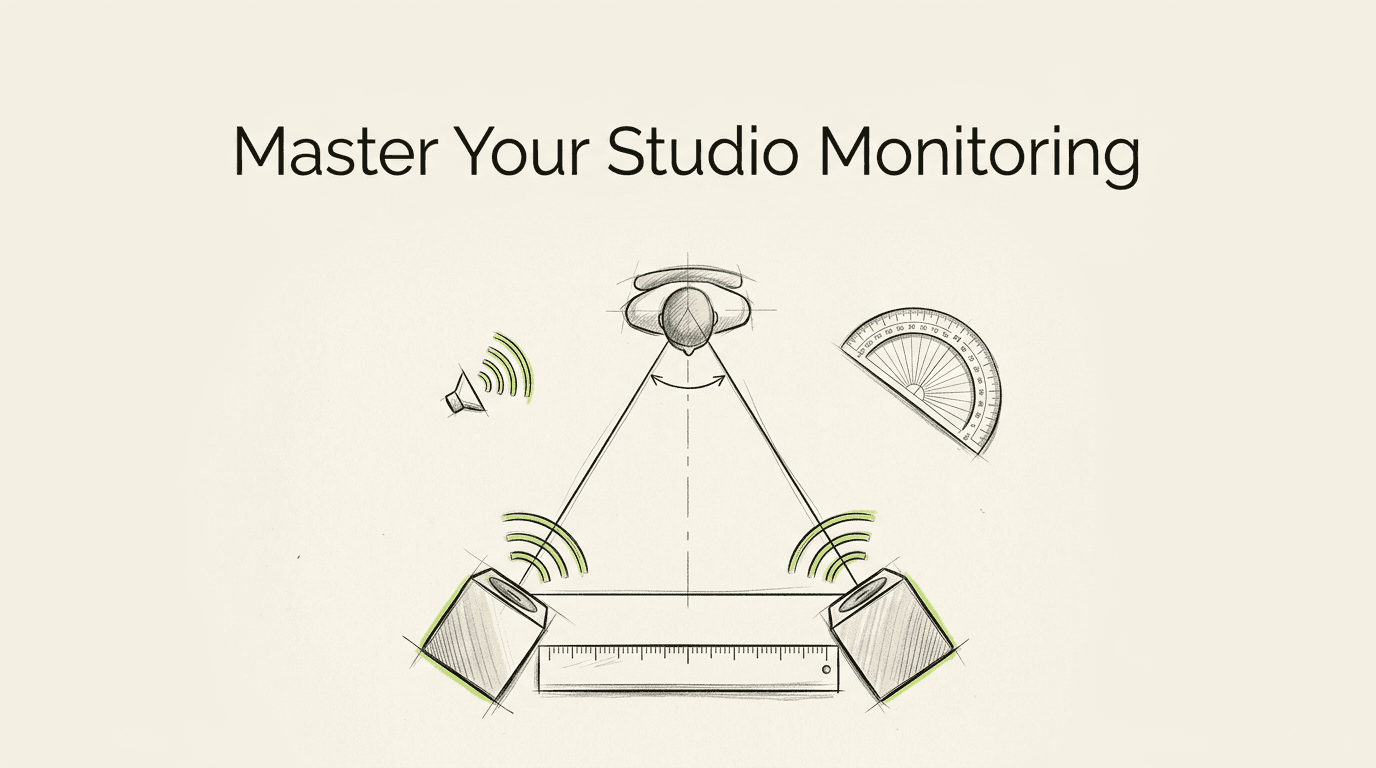
The phantom center - the psychoacoustic illusion that a lead vocal is floating directly in the air between two speakers - relies entirely on identical arrival times at the listener's left and right ears. If one monitor is even an inch closer to your head than the other, the resulting phase offset shifts the center image left or right and actively smears transient details like snare drum attacks.
To establish the geometry, use a laser measure to find the exact distance between the acoustic axes of the two monitors. The acoustic axis is typically the physical midpoint between the tweeter and the woofer. That precise measurement must also be the exact distance from each monitor to a point located immediately behind your head. This forms a perfect 60-degree equilateral triangle.
The tweeters must sit exactly at ear level when you are stationed in your normal, relaxed mixing posture. High frequencies are highly directional, projecting forward like a flashlight beam. If a tweeter fires at your chest or aims above your forehead, the off-axis high-frequency roll-off will falsely trick you into boosting the treble on every track you process.
The most damaging mistake here is focusing solely on the triangle. You cannot completely ignore the room's symmetry. Suppose the left monitor is three feet from a side wall. The right monitor sits five feet from the opposite side wall. Early acoustic reflections will reach you at wildly different times. This ruins stereo imaging. The triangle's physical perfection simply does not matter. When preparing a room for dedicated mixing services, the listening position must be perfectly centered between the left and right side walls.
2. Decoupling the Monitors from Structural Resonance
Placing speakers directly on a wooden desk, a shelf, or a hollow meter bridge guarantees inaccurate low-end monitoring. The intense mechanical energy from the woofer transfers directly through the cabinet into the furniture. The desk surface begins to vibrate, effectively acting as an unintended, uncalibrated secondary speaker that resonates heavily in the muddy 100 Hz to 250 Hz range.

This structural resonance extends the decay time of low-frequency transients, a phenomenon engineers often describe as "smearing" or "overhang." When you hear a flabby, loose kick drum, you might reach for a fast compressor or decisively cut 150 Hz with an EQ, only to find the problem disappears entirely in the car. The mud was physically vibrating in the furniture, not digitally recorded in the mix.
Practical rule: If you can feel the desk vibrating when you place your open hand firmly on the surface during a bass-heavy track, your monitors are mechanically coupled to the room and your low-mid mixing decisions will not translate.
To fix this, monitors must be mechanically decoupled. Heavy, freestanding mass-loaded stands made of tubular steel and filled with kiln-dried sand provide the highest mass and lowest possible resonance. If desk placement is completely unavoidable due to space constraints, do not rely on cheap acoustic foam, which easily compresses over time and eventually recouples the speaker. Instead, use specialized high-density sorbothane pads or spring-loaded isolation pucks that actively convert mechanical vibration into trace amounts of heat, breaking the mechanical transmission path between the cabinet and the desk surface.
3. Calibrating for Speaker Boundary Interference Response (SBIR)
Unlike high frequencies, which beam forward directionally, low frequencies (generally everything below 250 Hz) are entirely omnidirectional. They wrap physically around the speaker cabinet, travel backward to hit the rigid front wall behind the monitors, and then bounce aggressively back toward the listener.
When that reflected bass wave collides in mid-air with the direct sound wave coming from the front of the woofer, they phase-cancel each other out. This acoustic phenomenon is called Speaker Boundary Interference Response (SBIR). It creates a severe acoustic dip - often a complete, uncorrectable null - at a specific low frequency. For example, if a monitor is roughly 3.4 feet from the front wall, the round trip for the acoustic reflection is 6.8 feet, matching the wavelength of roughly 165 Hz. This causes a massive cancellation right where the fundamental punch of a bass guitar lives.
The mistake engineers routinely make is attempting to fix this deep null with digital EQ. Boosting the missing frequency on the master bus only forces the woofer to work harder, which simultaneously increases the energy of the reflection. This results in the exact same phase cancellation, but now with heavily distorted amplifier headroom.
The solution is entirely positional. You must physically change the distance between the monitor and the front wall. Pushing the monitors nearly flush against the wall moves the cancellation null high up into the lower midrange, where standard rigid fiberglass acoustic panels can absorb the reflection. Alternatively, pulling the monitors far out into the room pushes the null safely below the speaker's frequency response entirely. This rigorous placement strategy is a defining characteristic of facilities designed for professional audio mastering, where full-range mastering studio speakers require absolute acoustic neutrality to make final, binding dynamic decisions.
4. Mitigating Desk Bounce and Comb Filtering
Even with decoupled stands and perfect wall spacing, a flat studio desk or a large mixing console introduces its own acute acoustic hazard: desk bounce. The direct sound from the monitors reaches your ears first, followed less than a millisecond later by a secondary reflection bouncing violently off the hard work surface directly in front of you.
Because this reflection arrives slightly delayed, it causes constructive and destructive phase interference across the frequency spectrum. This creates a severe comb filtering effect, typically hollowing out the most critical vocal frequencies between 400 Hz and 800 Hz. The symptom is a mix where the lead vocal feels thin, nasal, and recessed inside the studio, yet overpoweringly loud and boxy on consumer systems.
To check for desk bounce, hold a small handheld mirror flat on your desk and sit in your normal, upright listening position. If you can see the monitor's tweeter or woofer clearly in the mirror, the acoustic sound path is bouncing directly from that specific speaker driver to your ear via that exact spot on the desk.
The physical fix involves angling the monitors slightly downward (if mounted unusually high) or adjusting the vertical height of the stands so the reflection path safely overshoots the listener's ear. Some mix engineers take this a step further by tilting the desk itself at a slight downward angle to purposely deflect these reflections toward the floor.
5. Setting a Fixed Reference Listening Level
Human hearing is profoundly non-linear. According to the Fletcher-Munson equal-loudness contours, our ears are remarkably less sensitive to extreme low bass and extreme high treble at quiet volumes. If you mix at a very low volume, you will naturally boost the bass and the treble to compensate for your own biological hearing deficiency, resulting in a harsh, overly bass-heavy mix when the track is finally played loudly. Conversely, mixing at deafening volumes flattens out the ear's perceived frequency response but rapidly induces temporary threshold shift (ear fatigue), causing you to make dull, lifeless, and overly compressed mixes.
The mechanism to solve this is mixing at a fixed, strictly calibrated reference level where human hearing is flattest without causing premature fatigue. For smaller mix rooms, this target is typically around 75 to 80 dB(C).
To successfully calibrate this, purchase a dedicated hardware SPL meter. Set the device to C-weighting (which measures low frequencies accurately, unlike A-weighting) and a Slow meter response. Generate pink noise directly through your DAW at -20 dBFS. Adjust your monitor controller until the meter, held exactly at ear level in the listening position, reads 75 dB. Mark this exact spot on your volume knob.
The most damaging mistake you can make is constantly riding the volume knob up and down throughout the entire mixing process. While doing brief, occasional checks at whisper-quiet levels is useful for checking lead vocal balances, the core frequency equalization decisions must be performed consistently at your marked reference level.
6. Integrating Secondary Translation Checks
No single pair of speakers, no matter how precise the acoustic engineering, tells the entire story. Full-range audio mastering monitors are explicitly designed to reveal the deepest sub-bass and the absolute widest stereo image, but their massive bandwidth can sometimes mask specific clutter in the critical midrange that becomes glaringly obvious on smaller, bandwidth-limited systems like laptops, televisions, or smart speakers.
This is why translation checks are mandatory before printing a final mix. A common approach is routing the mix through a single, mono "grotbox" speaker placed perfectly in the center of the desk. A single-driver speaker removes the crossover network entirely, providing an unvarnished, brutal view of the midrange where the snare drum and lead vocal viciously fight for space.
Additionally, the room itself will always impart some level of acoustic signature. Utilizing mixing and mastering headphones bypasses the room's acoustic influence entirely. In a room, your left ear hears the left speaker, but a fraction of a second later, it also hears the right speaker, albeit shadowed by your head. This acoustic crosstalk is what naturally blends a stereo mix together. Because headphones physically isolate the left and right channels entirely, they remove this crosstalk. This makes them ruthless, surgical tools for identifying micro-clicks, subtle panning imbalances, and ultra-low bass extension that smaller monitors might miss.
However, this lack of crosstalk also artificially exaggerates the stereo width, which is exactly why panning decisions made exclusively on headphones often translate as narrow, cluttered, and mono-heavy on actual speakers. When preparing final masters intended for loudness normalization on streaming platforms like Spotify and Apple Music, consistently cross-referencing between calibrated monitors and high-impedance headphones ensures the stereo field survives the transition without collapsing.
Common Pitfalls and Troubleshooting
When mixes fail to translate, engineers routinely blame their expensive equipment rather than their flawed geometry. Below are the most common, visually identical translation failures, the distinct symptoms you can verify today, and the specific physical fixes required.
Symptom: The mix has heavy, overpowering, and muddy sub-bass in the car, but sounded incredibly tight and aggressively controlled in the studio.
- Diagnosis: You are sitting dead inside a low-frequency room mode null, or suffering from severe SBIR from the front wall. The room is artificially sucking the bass energy out of the air exactly at your listening position. Because you physically could not hear the bass the monitors were producing, you pushed the EQ up on the console to compensate.
- The Fix: Do not change your EQ habits or buy new plugins; change your physical position. Move the listening chair straight forward or directly backward by 12 inches to escape the null, or fundamentally adjust the distance between the heavy monitors and the front wall.
Symptom: The snare drum and vocals sound hollow, deeply phasey, or noticeably lacking in physical impact, yet the stereo width seems perfectly fine.
- Diagnosis: This is classic desk bounce comb filtering. The primary acoustic reflection off your large work surface is arriving at your ears slightly behind the direct sound, carving a massive phase hole right in the 400-800 Hz vocal range.
- The Fix: Raise the speaker stands by a few inches vertically and tilt the monitors slightly downward toward your ears, actively moving the primary reflection geometry away from the listening axis.
Symptom: Reverb tails are dramatically too loud, and the mix sounds overly dry and claustrophobic outside the studio.
- Diagnosis: You are monitoring much too quietly, or the studio's ambient noise floor (spinning computer fans, loud HVAC systems) is too high. The ambient noise in the room is successfully masking the quiet, trailing reverb tails, prompting you to constantly turn up the effect returns until you can hear them over the air conditioner.
- The Fix: Rely entirely on a calibrated reference volume of at least 75 dB(C) to ensure the quietest dynamic details easily overcome the room's mechanical noise floor without triggering ear fatigue.
FAQ
How far from the wall should my monitors be? There is no single correct measurement, as it depends strictly on the physical dimensions of your room and the frequency response of the speaker. Generally, monitors should either be placed very close to the front wall (under 12 inches) to push the SBIR null into an easily treatable high frequency, or quite far away (over 5 feet) to push the null below the monitor's low-frequency limit.
Should studio monitors be placed horizontally or vertically? Unless the manufacturer explicitly states the monitor is purposefully designed for horizontal placement, they must be placed vertically. Turning a vertical monitor on its side places the tweeter and woofer side-by-side. As you move your head left to right across the console, the constantly changing distance between the two drivers causes severe comb filtering and extreme phase cancellation.
Do I need a subwoofer for accurate mixing? In an untreated, small square room, adding a heavy subwoofer often introduces significantly more translation problems than it solves by actively exciting severe low-frequency room modes. It is usually far more effective to rely on high-quality stereo monitors and use headphones to critically check the deepest sub-bass frequencies.
Can I calibrate my monitors using just room correction software? Room correction software is a valuable final step, but it simply cannot fix acoustic phase cancellations. Software can easily pull down a resonant peak, but if a hard reflection is causing a deep physical null at 80 Hz, boosting that frequency with software will only increase the reflection's energy and distort the speaker without filling the hole.